
HOW TO STRAIGHTEN CURLY HAIR: 7 STEPS TO SMOOTH, STRAIGHT HAIR

Straight, sleek hair makes quite a statement, and with a little effort (and a lot of patience!), it’s totally doable. Depending upon how tight your curls are, you can go from curly to smooth in no time.
Curly hair is naturally dry and prone to damage, so straightening your strands needs to be done very carefully. It’s a delicate process involving lots of heat-protecting products, but if you do it correctly, your sleek style can last several days! Here’s how to straighten curly hair and help prevent damage and breakage.
How to Straighten Curly Hair

1. Wash And Condition Your Curls
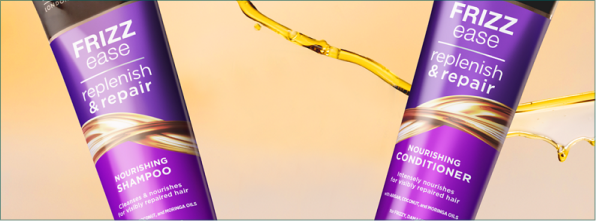
Before attempting to straighten your curls, you need to get rid of any product residue or buildup in your hair. Use an anti-frizz shampoo and conditioner specifically formulated to control frizz and prep your hair for straightening.
2. Use A Leave-in Conditioner.
After showering, spray a liberal amount of leave-in conditioner on your curls to help lock in moisture, prevent breakage and split ends, and protect against heat damage. Especially for curly hair that is more prone to frizz, leave-in conditioners help to nourish your hair.
3. Spritz Wet Curls With A Heat-protectant Flat Iron Spray.
To add even more protection against heat damage, use a heat straight flat-iron spray with a strengthening keratin complex. Be sure to coat every strand liberally to achieve maximum smoothness and frizz control.
4. Dry Your Hair Thoroughly.
If you have the time, let your hair air dry completely to save it from unnecessary heat exposure and friction. If you need to dry hair quickly, try using a diffuser to disperse the heat and reduce friction. Remember to blow dry upwards at the roots for better volume, while blow drying downwards for the rest of your gorgeous hair to reduce frizz.
Gently brush your hair as you dry it to detangle and help coax your strands into straightness. A detangler during this step is also handy to make straightening curly hair easier.
Never attempt to flat iron wet or damp hair! Flat ironing wet hair is less effective and can cause additional damage to your delicate strands.
5. Section Your Hair For Easier Straightening.
Once your hair is completely dry, split your hair into sections to make flat-ironing more manageable. The best way to do this is to work from the bottom layers of hair up. Pin the top two-thirds of your mane up, and work on the underside first.
6. Begin Straightening.
Working from the bottom-most layer of hair, pull a small section taut and pull it through your straightener, starting from the roots. Work with small enough sections that you only have to do two swipes of your flat iron. When the bottom layer of hair is straightened, unpin the rest of your hair and start straightening another section. Continue until each strand is smooth and shiny. Use a flat iron with long plates for quick straightening and frizz control for the best results.
Pro Tip: The ends of your hair tend to be the most delicate and prone to breakage. The ends are also thinner, requiring less heat to straighten. Stop mid-shaft when straightening your hair in sections to help protect them from excess heat damage. Then, at the very end, gather all your hair and straighten the ends together.
If you want to straighten your curly hair naturally without any heat, an option you may want to consider is wrap setting. For this technique, simply brush your wet hair and wrap it around your head as flat as you can, tightly holding it into place with bobby pins soon after.
7. Touch Up Your Straight Strands.
Give your newly straightened locks a good once-over in the mirror. Did you miss any spots? Run stubborn strands through your straightener again until you’re satisfied with the results. Then, put the finishing touches on your new sleek style with a hydrating, frizz-fighting smoothing cream. Remember not to apply too many hair products after hair straightening as it can create a greasy look. More doesn’t always mean better!
Hair Straightening Mistakes to Avoid
If you’ve straightened your hair, but the results aren’t as sleek and shiny as you had hoped, here are some of the most common hair-straightening mistakes and how to fix them.
- Your hair wasn’t dry enough. Be sure each strand is completely dry before attempting to straighten. Not only will you fry your hair trying to straighten it when wet, but it also doesn’t work well.
- The straightener wasn’t in the right heat setting. For thick, coarse, or curly hair, you’ll likely need to set your straightening iron between 350 and 400 degrees. To avoid scorching your hair, start at the lowest setting, and increase the heat as necessary to achieve the desired results.
- You used too many styling products. Styling products are key to achieving your perfect look, but too many can weigh down your hair. Focus on using only the above products that hydrate your strands and protect against heat.
- You tried straightening too large of sections. Straightening thick, curly hair is best done in small, 1-inch sections. Smaller sections are more manageable and will allow you to straighten quickly and effectively.
More Hair Straightening Tips for Curly Hair
- Avoid putting your hair up right after straightening. Don’t risk putting a kink in your gorgeous, sleek style! Newly straightened hair is much more susceptible to bends and kinks from hair elastics than two or three-day-old straightened hair.
- Treat dry ends. Instantly tame frizz and nourish dry ends with smoothing hair oil. A dry oil can revive straightened hair, making it look as soft and shiny as it did on day 1. A hair straightening cream can help as well.
- Get regular trims. Too much straightening and heat exposure can lead to split ends and frizzy strands. Make sure to cut curly hair regularly to clean up dry ends and keep your hair looking healthy.
- Sleep on silk. Some of the worst damage to your hair happens while you sleep. Rough cotton pillowcases create frizz-inducing friction, causing you to wake up with some wild bed head. Swap your cotton pillowcase for silk to reduce friction and prevent frizz.
- Sleep on silk. Some of the worst damage to your hair happens while you sleep. Rough cotton pillowcases create frizz-inducing friction, causing you to wake up with some wild bed head. Swap your cotton pillowcase for a silk one to reduce friction and prevent frizz.
Curly or sleek, love your strands. Check out even more of our tips for curly hair.